Running Zephyr on SiFive HiFive1
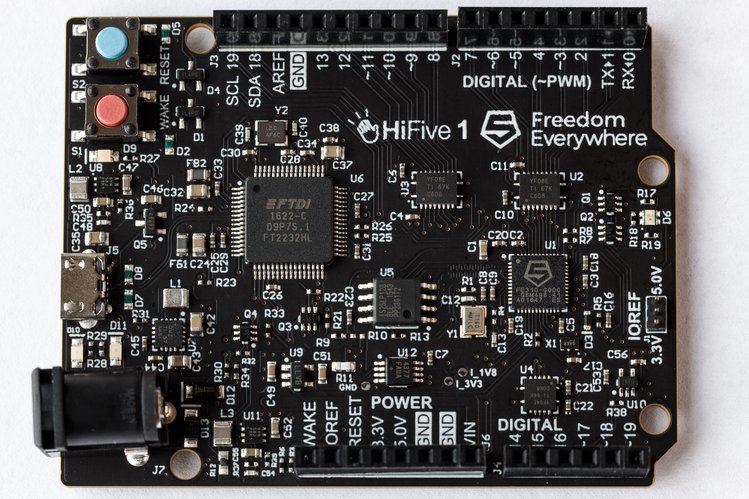
SiFive’s HiFive1 is an Arduino-Compatible development kit featuring the Freedom E310, the industry’s first commercially available RISC-V SoC.
It’s a very good starting point if you want to get Zephyr running on a physical chip/board. SiFive provides open source schematics, an Altium Designer PCB project, BOM, and - of course - tooling for the HiFive1.

Fig. 1 The HiFive1 board - top.
Setting up the enviroment
Please remember to get the sources and setup the environment first.
Getting tools for HiFive1 board
Download and extract a prebuilt OpenOCD and GDB with RISC-V from SiFive’s website:
# GDB
wget https://static.dev.sifive.com/dev-tools/riscv64-unknown-elf-gcc-2018.07.0-x86_64-linux-ubuntu14.tar.gz
tar xzfv riscv64-unknown-elf-gcc-2018.07.0-x86_64-linux-ubuntu14.tar.gz

# OpenOCD
wget https://static.dev.sifive.com/dev-tools/riscv-openocd-2018.7.0-x86_64-linux-ubuntu14.tar.gz
tar xzfv riscv-openocd-2018.7.0-x86_64-linux-ubuntu14.tar.gz
SiFive provides an open source SDK for their Freedom E platform.
Download Freedom E SDK and move previously downloaded prebuilt tools to their respective directories:
git clone https://github.com/sifive/freedom-e-sdk
mv riscv64-unknown-elf-gcc-2018.07.0-x86_64-linux-ubuntu14/* freedom-e-sdk/riscv-gnu-toolchain
mv riscv-openocd-2018.7.0-x86_64-linux-ubuntu14/* freedom-e-sdk/openocd
Note
If you wish to build the toolchain yourself, please refer to the instructions on SiFive’s GitHub.
Compiling an example
Create a build directory (we will use build-example here) and compile an example binary inside it with the following commands:
mkdir build-example
cd build-example
cmake -DBOARD=hifive1 $ZEPHYR_BASE/samples/hello_world
make -j $(nproc)
cd ..
Flashing
Move to your Freedom E SDK directory and connect to the board with OpenOCD:
cd freedom-e-sdk
sudo openocd/bin/openocd -f bsp/env/freedom-e300-hifive1/openocd.cfg
Leave OpenOCD running and connect to the board with GDB, disable flash protection and load the binary (assuming it’s in the build-example directory you’ve created earlier):
Finally, you can connect with picocom to the serial console:
sudo picocom -b 115200 /dev/ttyUSBx # substitute "x" with appropriate port number
After resetting the board, a hello world message should appear. You can quit picocom using the C-a C-q key strokes.